Getting Started with Sphinx, MySQL and SphinxConnector.NET
Updated for Sphinx 2.0!This tutorial will guide you through setting up an index for Sphinx and accessing it from a .NET application using SphinxConnector.NET. The index will be created for the Sakila sample database provided by MySQL. To follow this tutorial you need to have a working installation of MySQL, Visual Studio 2008/10/12 and, of course, SphinxConnector.NET.
Setting Things Up
If you haven't already downloaded SphinxConnector.NET please do so now. SphinxConnector.NET is available as a NuGet package, and as a ZIP archive containing the DLL's and the documentation as a CHM file. Also download the current stable Windows version of Sphinx from the Sphinx site. Installing Sphinx is just a matter of unpacking the archive.
Next we need some data to search through. For this tutorial we'll use the Sakila database. Sakila is a sample database provided by MySQL which models a video rental store. We will use Sphinx and SphinxConnector.NET to do full-text searches through movie titles and descriptions, and filter movies based on attributes like rental rate or length. To import the data into your MySQL server, just unpack the archive and execute the two scripts against your MySQL server, e.g. via the MySQL command line client or a graphical client like MySQL Workbench. After creating the database we can now index some data.
A Quick Word About Other Databases
Although this tutorial uses MySQL as the datasource, the same steps apply to other supported databases like MSSQL and PostgreSQL. You just have to change the type in the source section of your sphinx.conf file.
Creating the Index
Now create a file named sphinx.conf in the directory where the Sphinx executable files reside (usually the bin directory) and copy the following text into the file:
source sakila
{
    type                 = mysql

    sql_host             = localhost
    sql_user             =
    sql_pass             =
    sql_db               = sakila

    sql_port             = 3306

    sql_query            = SELECT film_id, title, description, release_year, rental_rate, \
                                  language_id, length, UNIX_TIMESTAMP(last_update) \
                                  AS last_update, 0 AS recommended_by_friends \
                                  FROM film f;

    sql_attr_uint        = release_year
    sql_attr_float       = rental_rate
    sql_attr_uint        = language_id
    sql_attr_uint        = length
    sql_attr_timestamp   = last_update
    sql_attr_multi       = uint actor_id from query; SELECT film_id, actor_id FROM film_actor;
    sql_attr_multi       = uint rating from query; SELECT film_id, CRC32(rating) FROM film;
    sql_attr_bool        = recommended_by_friends
}

index sakila
{
    source               = sakila
    path                 = sakila
    charset_type         = utf-8

    min_word_len         = 1
    min_prefix_len       = 0
    min_infix_len        = 1
}

searchd
{
    listen                  = localhost:9312
    listen                  = localhost:9306:mysql41
    compat_sphinxql_magics  = 0
    log                     = searchd.log
    query_log               = query.log
    pid_file                = searchd.pid
    max_matches             = 1000
    workers                 = threads
    binlog_path             =
}

indexer
{
	mem_limit = 256M
}
Now adjust the following settings for your installation of MySQL:
- sql_user: The (MySQL) user, the indexer should use to logon to server
- sql_pass: The password of the user
- sql_host: The IP address or the name of the host where the MySQL server resides
- sql_port: The port of the MySQL server
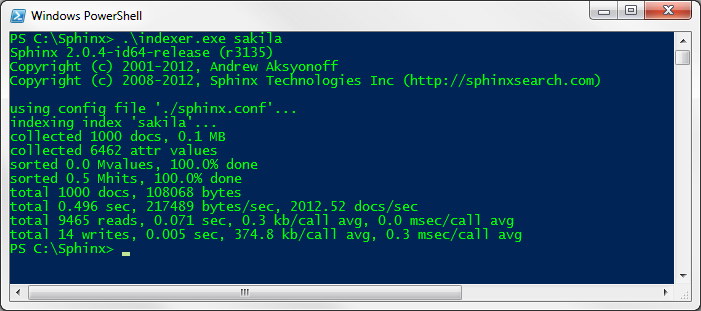
Now open a command line or PowerShell window and switch to the directory where the indexer executable resides. To create the index type indexer.exe sakila and hit enter. The indexer will pull the data from the MySQL server and create the index files. You should now see output similar to this:
The index has been created and can now be accessed from SphinxConnector.NET. Now start the Sphinx search daemon by typing searchd and hitting enter. Note that in a production environement you'll usually want to run Sphinx as a service.
Executing a Query with SphinxConnector.NET's Native API
Start Visual Studio and create a new Console Application named SphinxConnectorDemo. Either add SphinxConnector.NET via NuGet to your project or manually add a reference to SphinxConnector.dll and Common.Logging.dll to your project. Put the following code in the Main method of the Program.cs file:
SphinxClient sphinxClient = new SphinxClient();
sphinxClient.Version = SphinxVersion.V207; //Adjust if you're using another version
sphinxSearchResult = sphinxClient.Query("room", "sakila");

foreach (SphinxMatch match in sphinxSearchResult.Matches)
{
    Console.WriteLine("DocumentId {0} Weight{1}", match.DocumentId, match.Weight);
}

Console.ReadLine();
You also need to add the following using directive:
using SphinxConnector.NativeApi;
What the code does is this: First, create an instance of the SphinxClient class, which provides access to Sphinx via the native API (the other possible API being SphinxQL). Next, we use the Query() method to search for documents which contain the word "room" in all fields that were setup for full-text search. In our example that is the title and the description field. We also specify that we only want to search through index with the name "sakila" (we've setup only one index, so the result would be the same if didn't specify any name). Query() returns an instance of the SphinxSearchResult class which hold information about the documents which match our query. Last, we just output the ids and the weight of the matched document.
If you hit F5 to start our little demo, you should see the console window outputting the following lines:
DocumentId 52 Weight 1

DocumentId 87 Weight 1

DocumentId 743 Weight 1
In a real world application you wouldn't of course just output the document ids, but rather use them to fetch the real documents from the database. We could also declare string attributes for the title and description fields to have Sphinx store their contents in the index. This way we can retrieve them directly from Sphinx and avoid hitting the database alltogether.
Filtering Documents Based on Attribute Values
In many cases we don't just want to perform a full-text search, but rather filter our results based on other criteria. In our example video rental store, we might want to search only for films within a certain price range or only films with a certain actor. If you look at the configuration for our index, you'll see that we added quite a few attributes to the index, including the rental rate and the actors. We'll now setup filters based on these two attributes.
To specify a filter for a query, the SphinxClient class provides the methods SetFilter and SetFilterRange. We'll now add a filter on the rental rate attribute to our example:
sphinxClient.SearchOptions.SetFilterRange<Sphinxfloat>("rental_rate", 0, 0.5f);
Trying to be cheap, we do not want to pay more then 50 cents for a movie. Alas, if we run the search again, no results are returned. Seems that we have pay a bit more to rent a movie here, so we remove the filter. But, if we have pay more than 50 cents, at least our favorite actress Uma Wood should be in the movie. So let's set a filter on the actor id attribute. Looking at the actor table in the database, we learn that Uma's id is 13, so the filter looks like this:
sphinxClient.SearchOptions.SetFilter<SphinxInteger>("actor_id", 13);
If now execute the search with our filter we get exactly one result. Seems that we found the movie we'll be watching tonight.
Conclusion
In this tutorial you saw how to setup Sphinx and create an index. We then accessed this index from a .NET/C# application with SphinxConnector.NET. We performed a basic full-text search and then extended our search with a filter on some document attributes. For a detailed description of the classes and its properties used in this tutorial please refer to the documentation.
Quicklinks
Want some extra help?
No problem, we offer consulting and custom development for Sphinx and .NET! Interested?To get in touch drop us a line!